Contact
Send me an email directly at [email protected] or use the form below to send me a message.
Sending Emails with the Microsoft Graph API
Published on August 10, 2024
Introduction
Recently I have been exploring options for sending emails programmatically for a contact form and found that most email services are expensive and include a lot of marketing focused features that I don't need. I instead opted to use a cheap Exchange Online plan and the Microsoft Graph API. Here's how you can do it too!
Prerequisites
- Microsoft 365 account with an active Exchange mailbox.
- Microsoft 365 account with administrator access to the Azure Portal.
Information about Exchange Online plans can be found here. At the time of writing the lowest plan costs only $6 AUD per month.
Azure Setup
In order for your application to send emails using the Microsoft Graph API you need to generate credentials in Azure that will allow it to authenticate and send emails.
1. Create an Enterprise Application
To allow your application to authenticate and integrate with Azure services you will need to create an Enterprise Application in Entra ID. The Enterprise Application will represent your application in Azure and will be used to assign permissions and generate credentials.
Log in to the Azure Portal and navigate to Entra ID > Enterprise Applications.
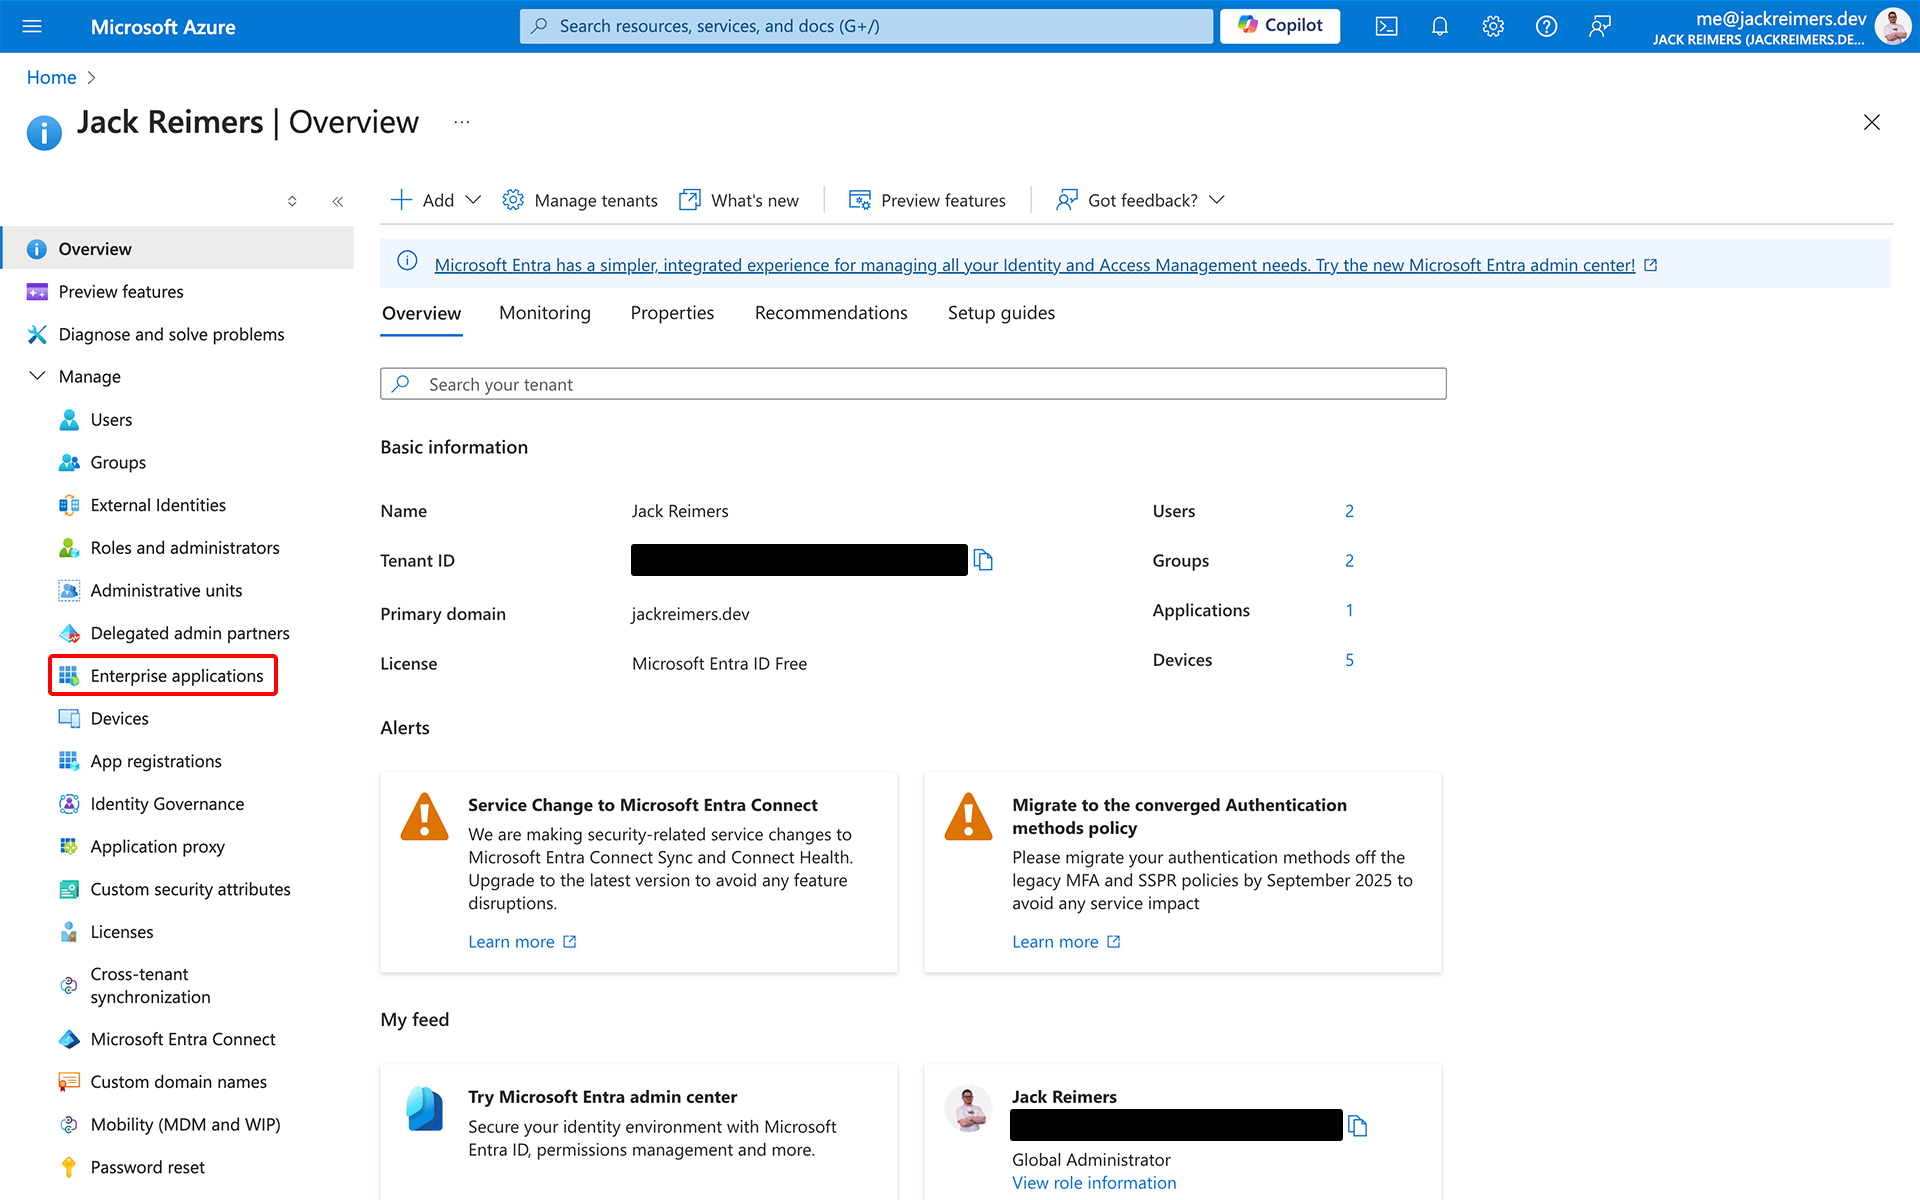
Click New application.
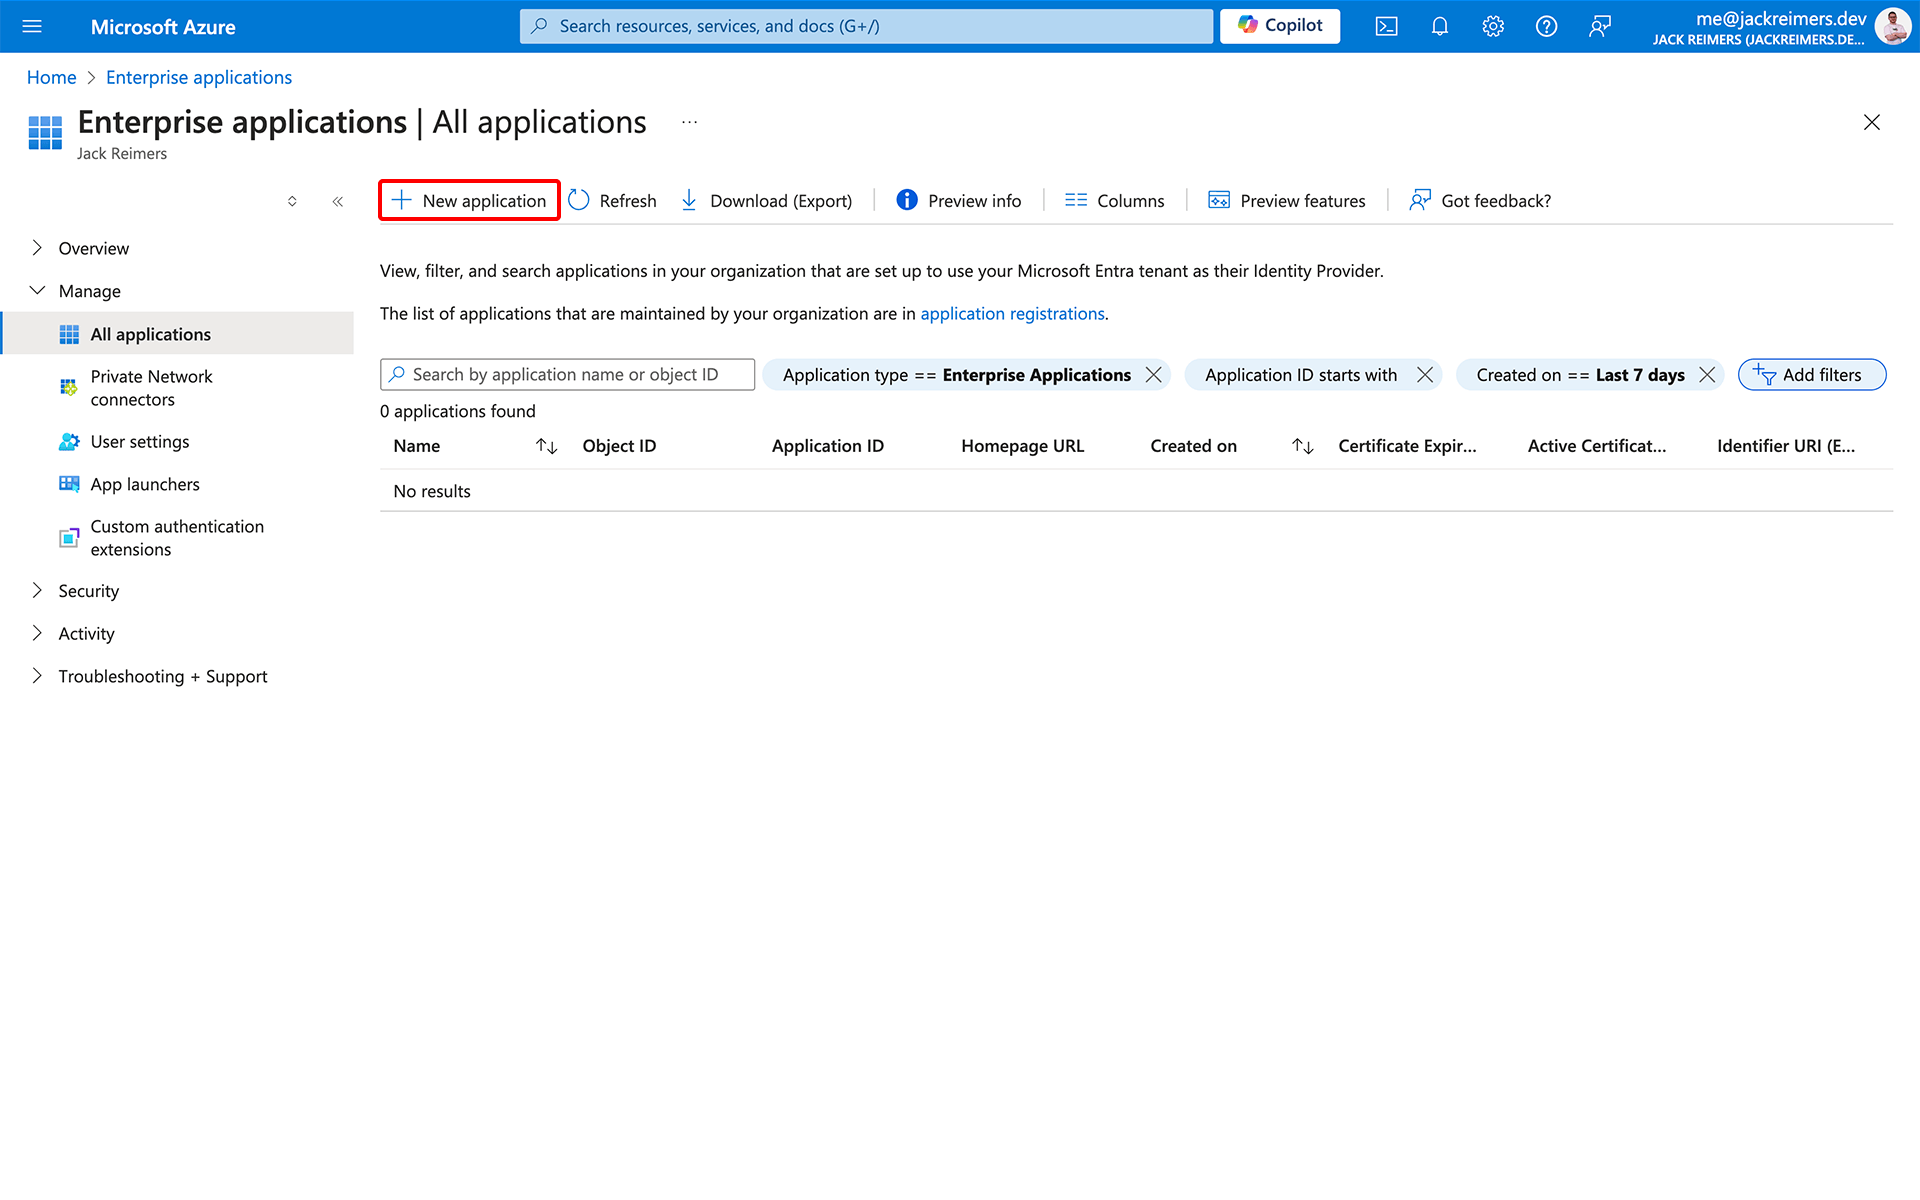
Click Create your own application, give your application a name, select the option Register an application to integrate with Microsoft Entra ID, and click Create.
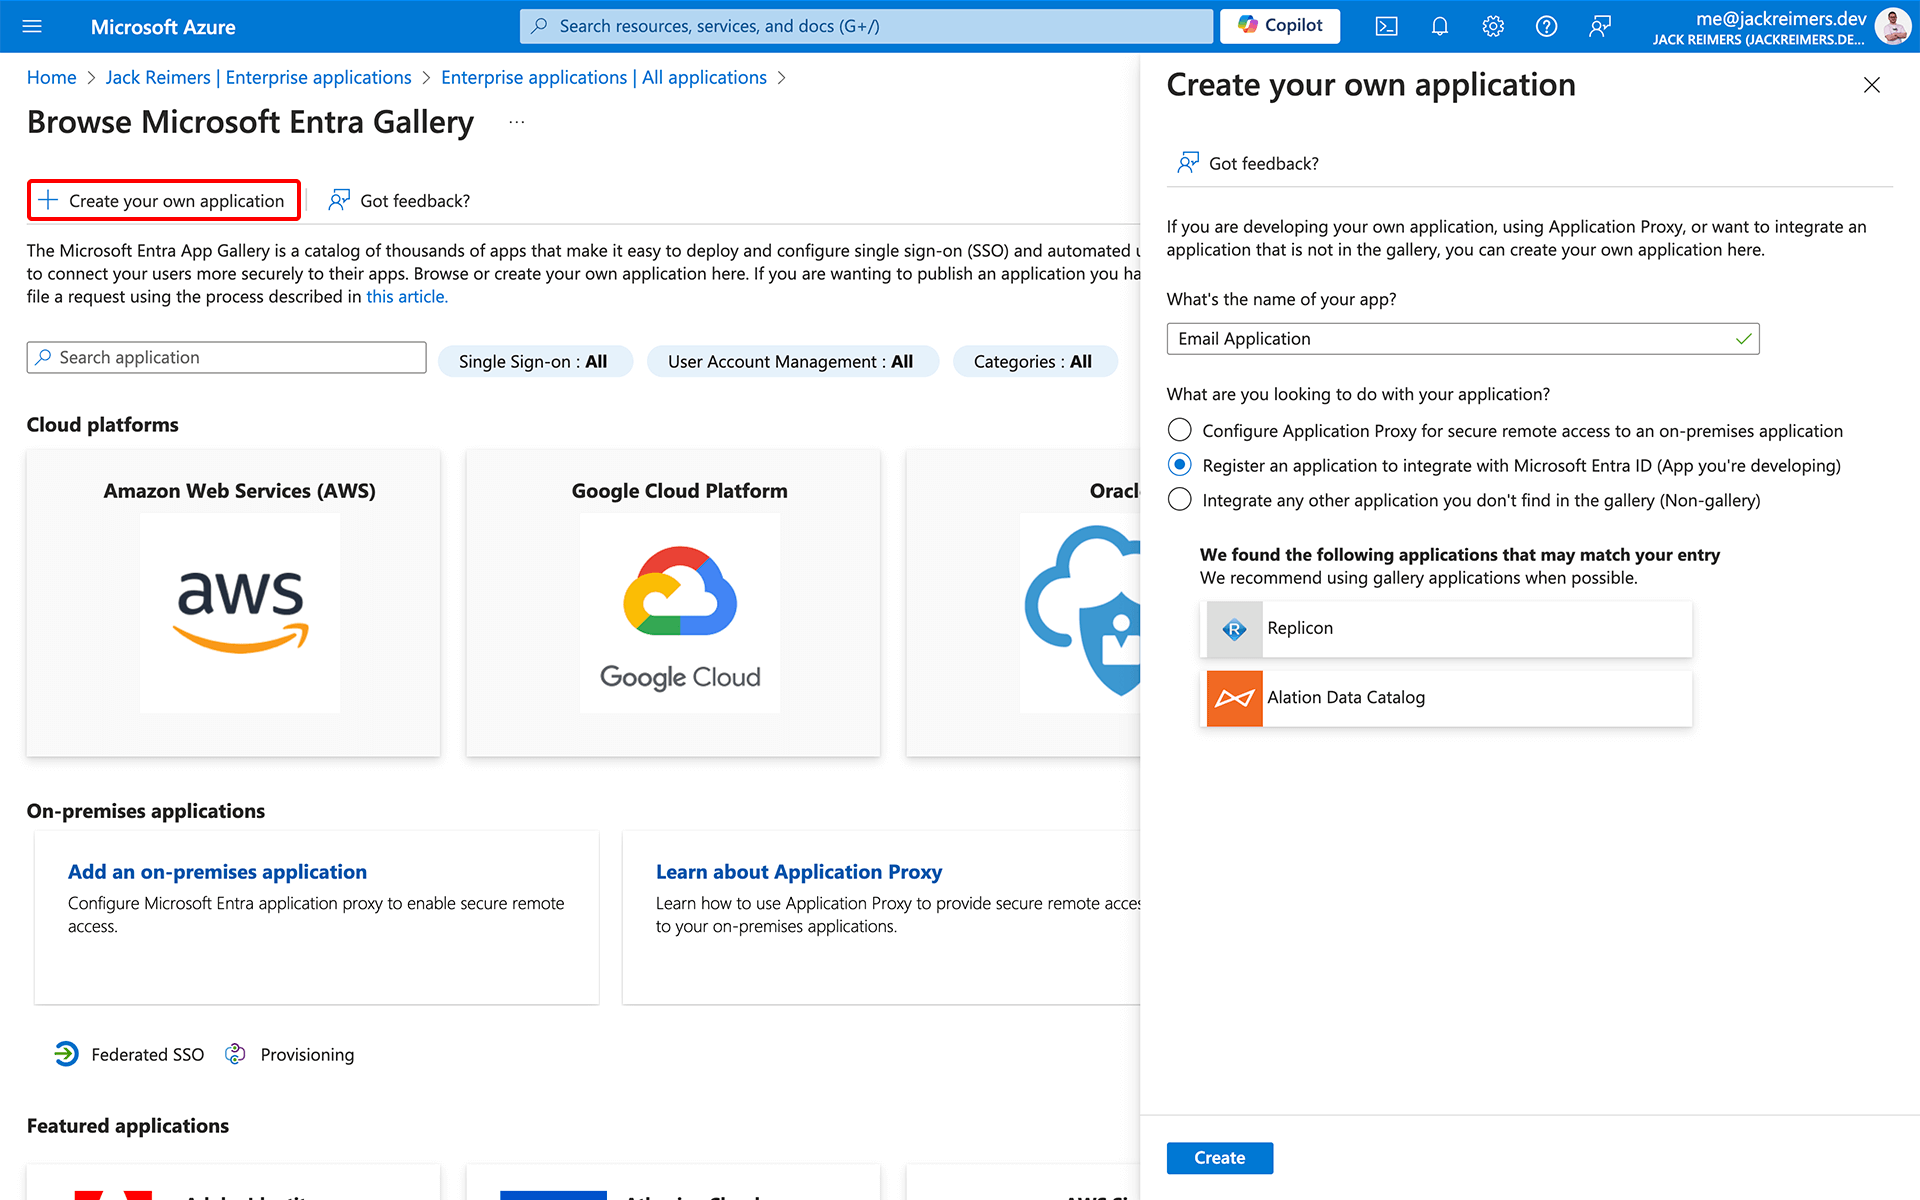
Select the option Accounts in this organizational directory only and click Register.
2. Grant Permissions
The Enterprise Application should now be created, but it will not be able to do anything useful until it is granted permissions. You will need to grant the Mail.ReadWrite and Mail.Send permissions in order to send emails.
Important
For security reasons, only ever grant the minimum permissions required.
Navigate to Entra ID > App registrations > All applications and open the application you just created.
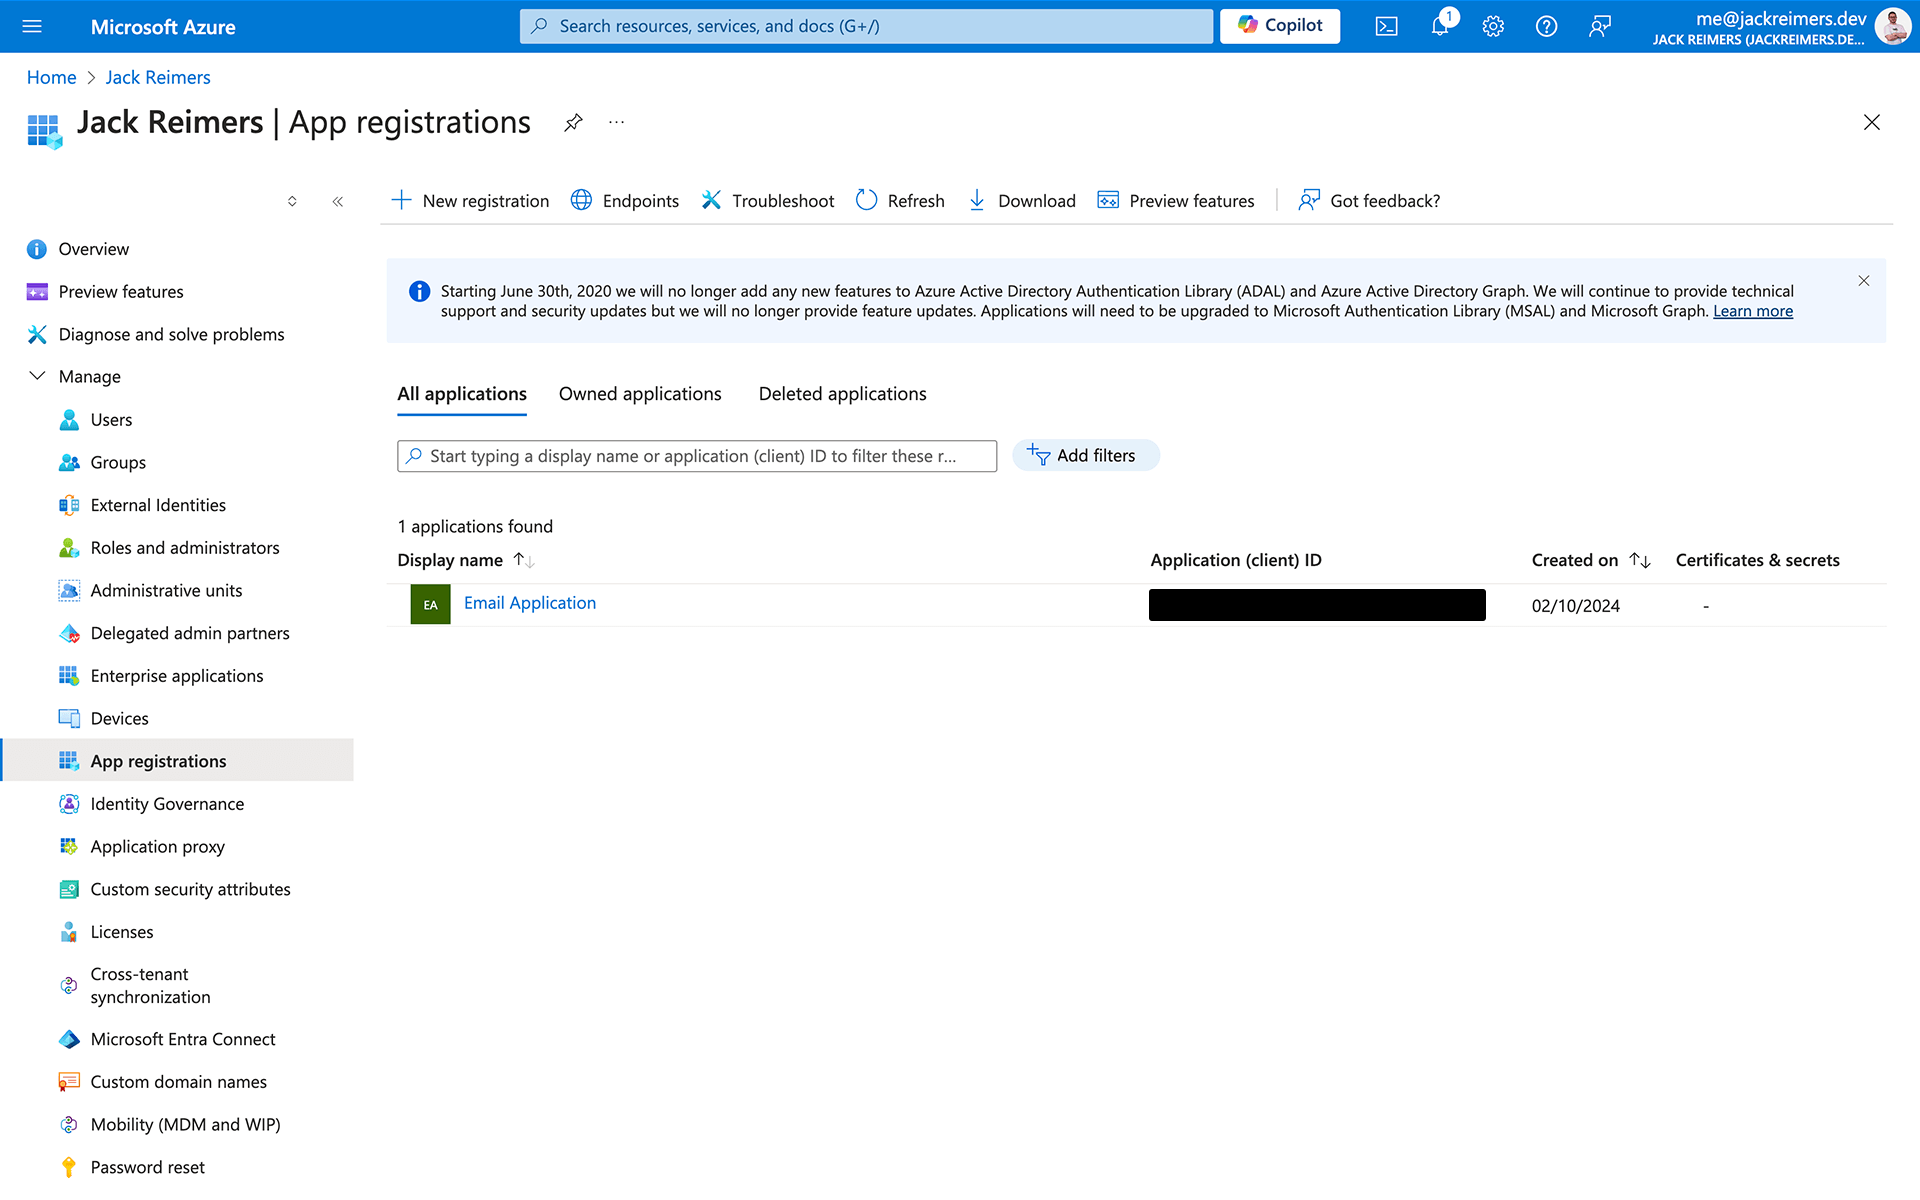
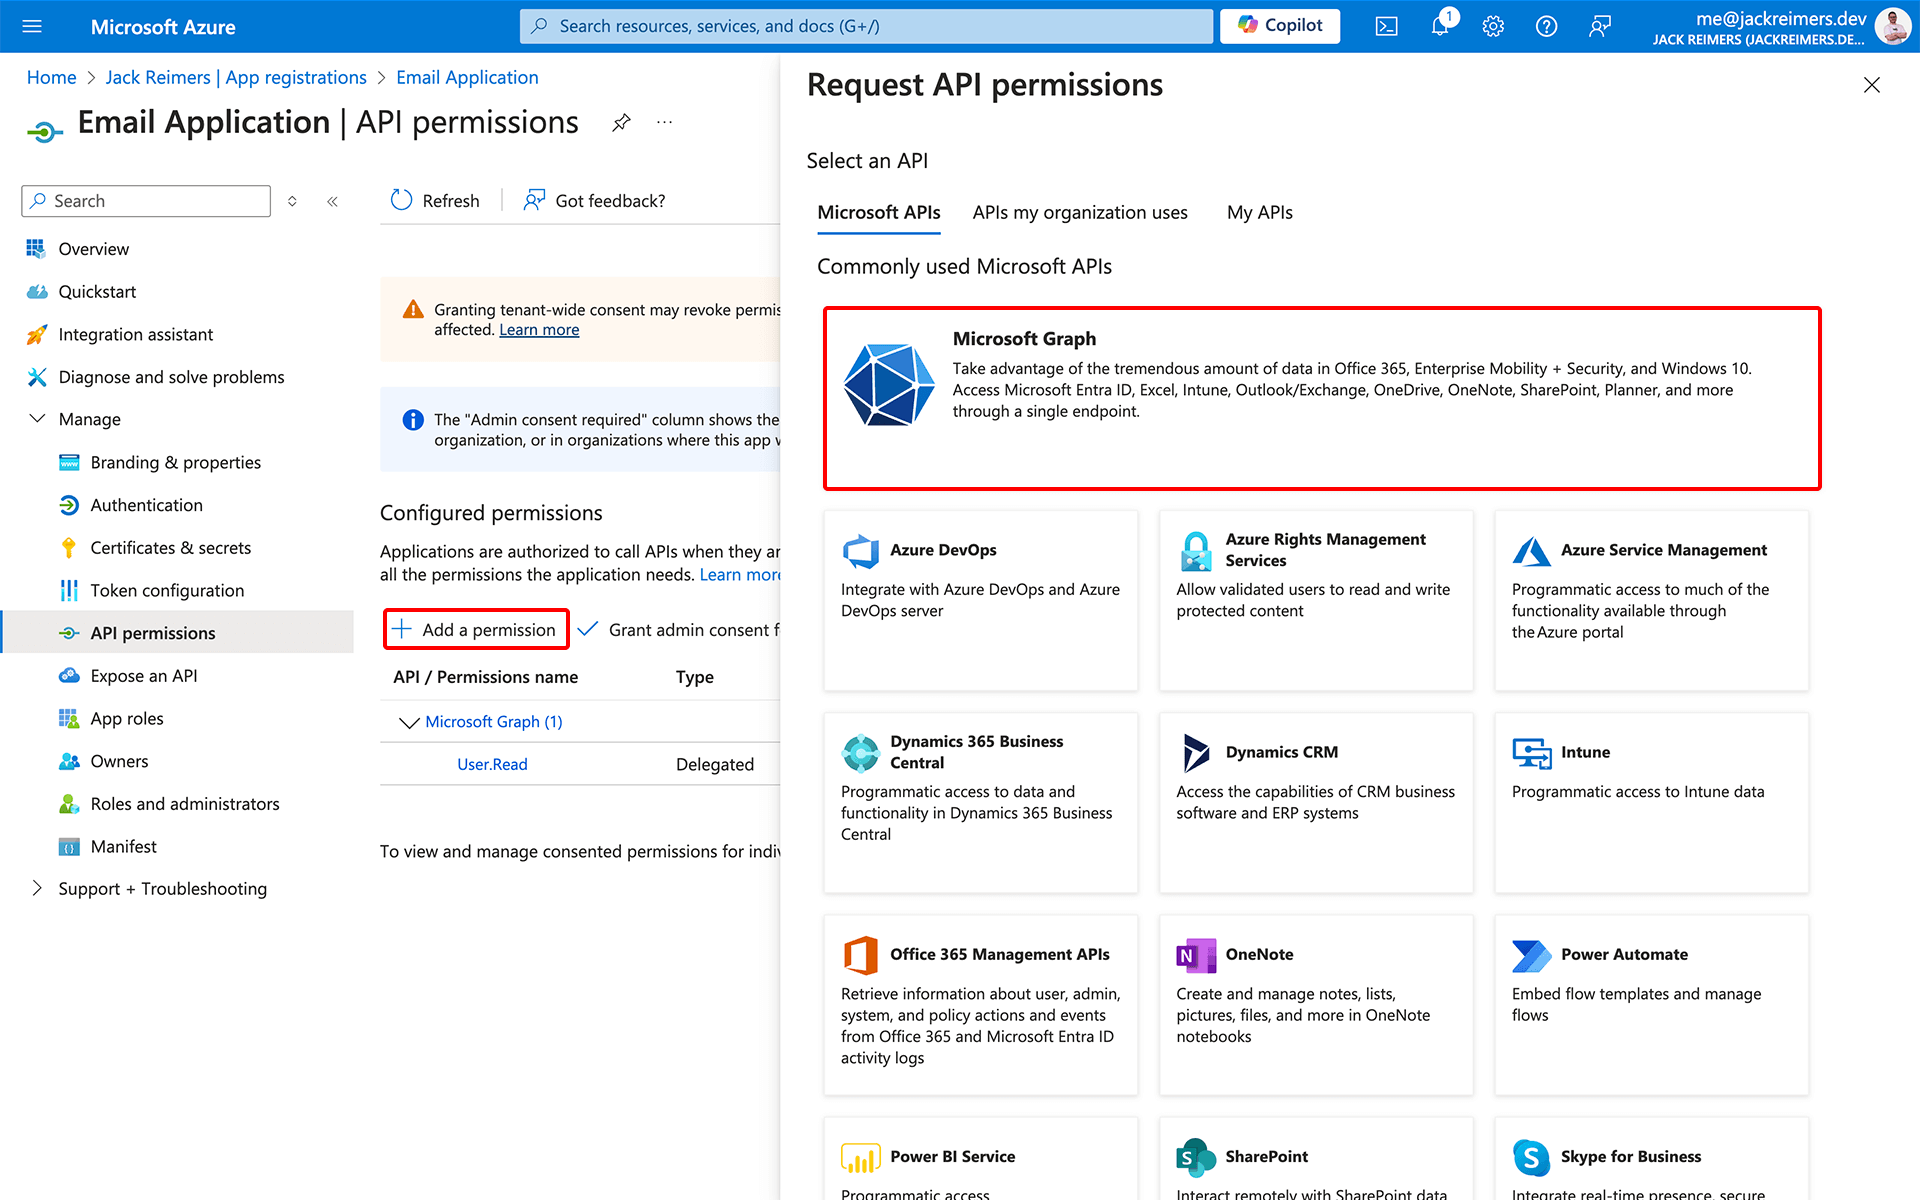
Navigate to API permissions, click Add a permission, then click Microsoft Graph.
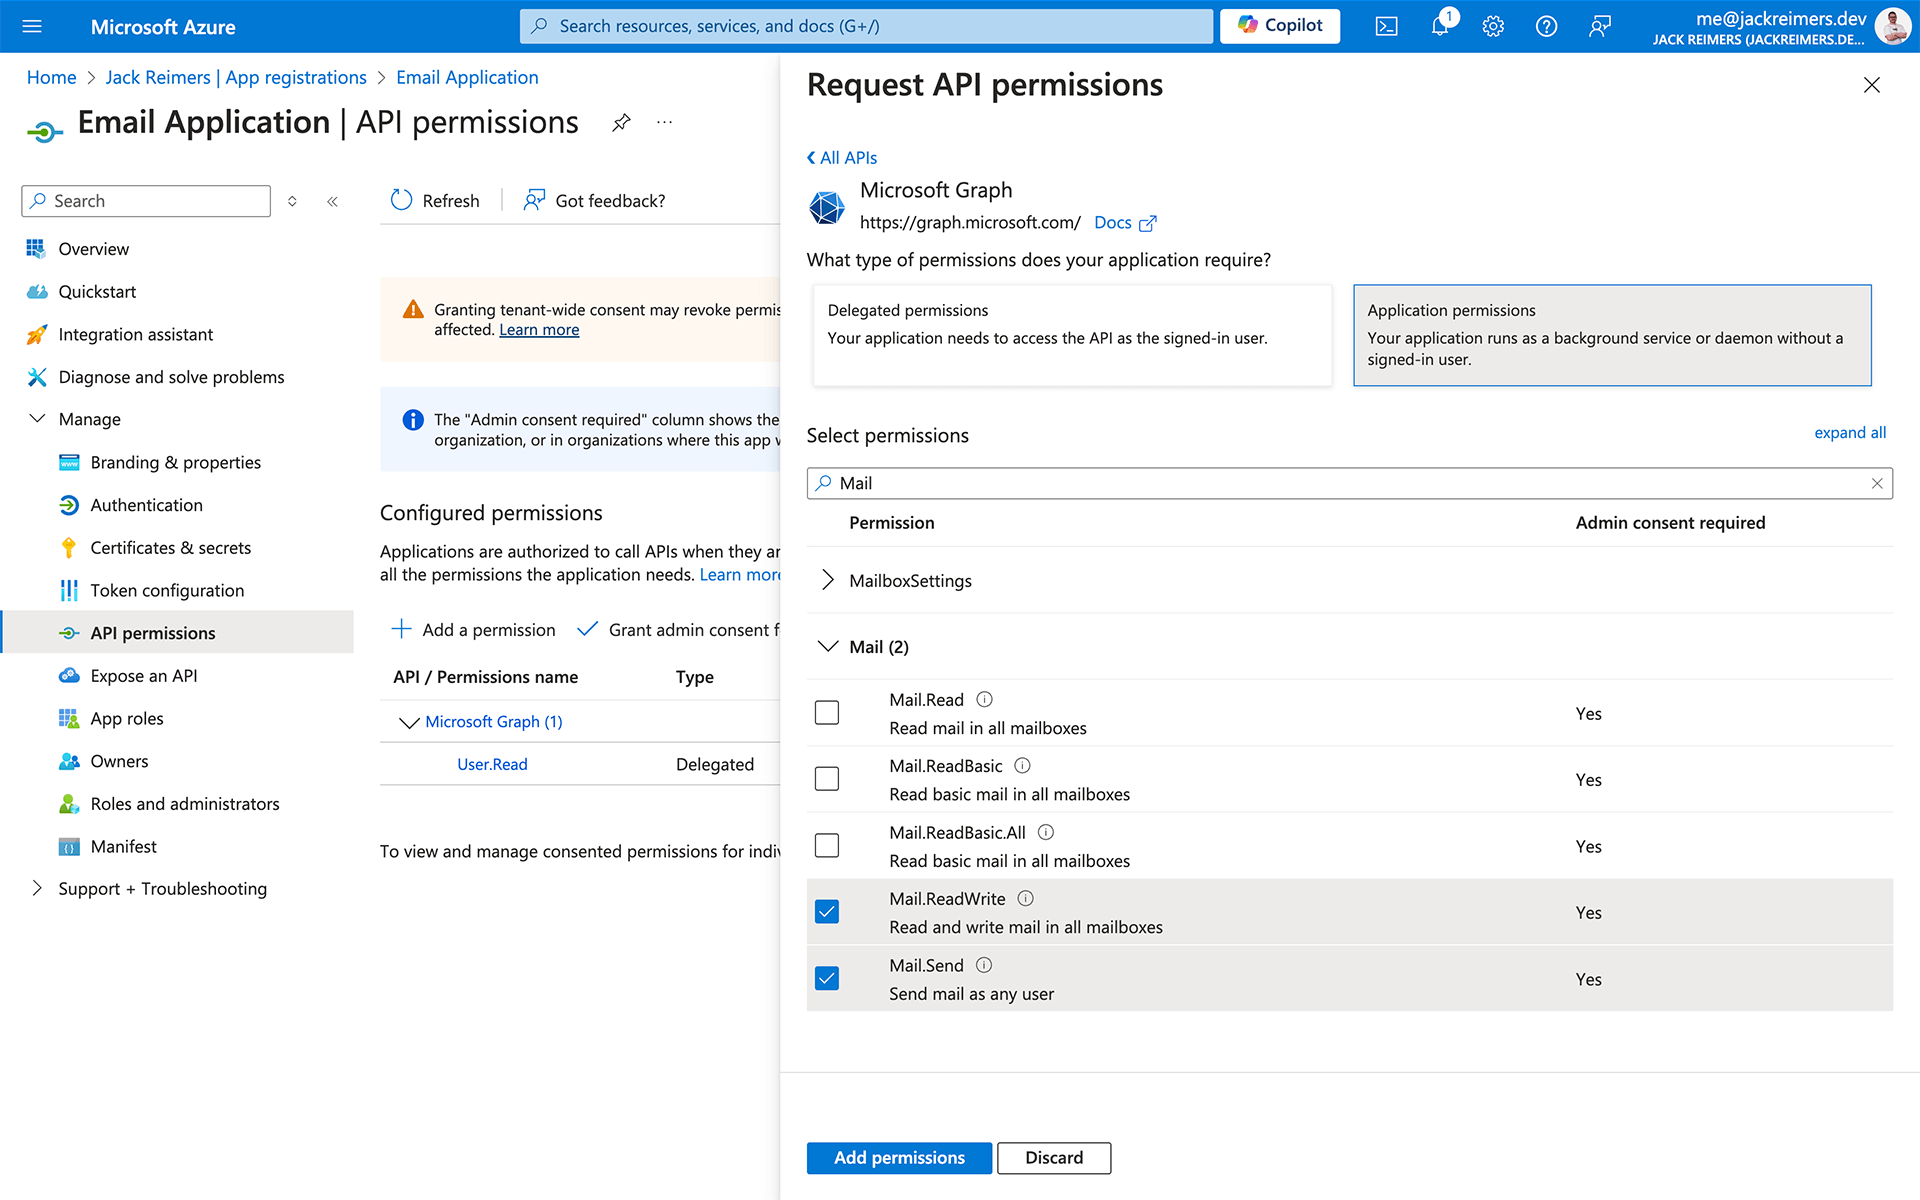
Select Application permissions, search for the permission Mail.ReadWrite and Mail.Send and select them, then click Add permissions.
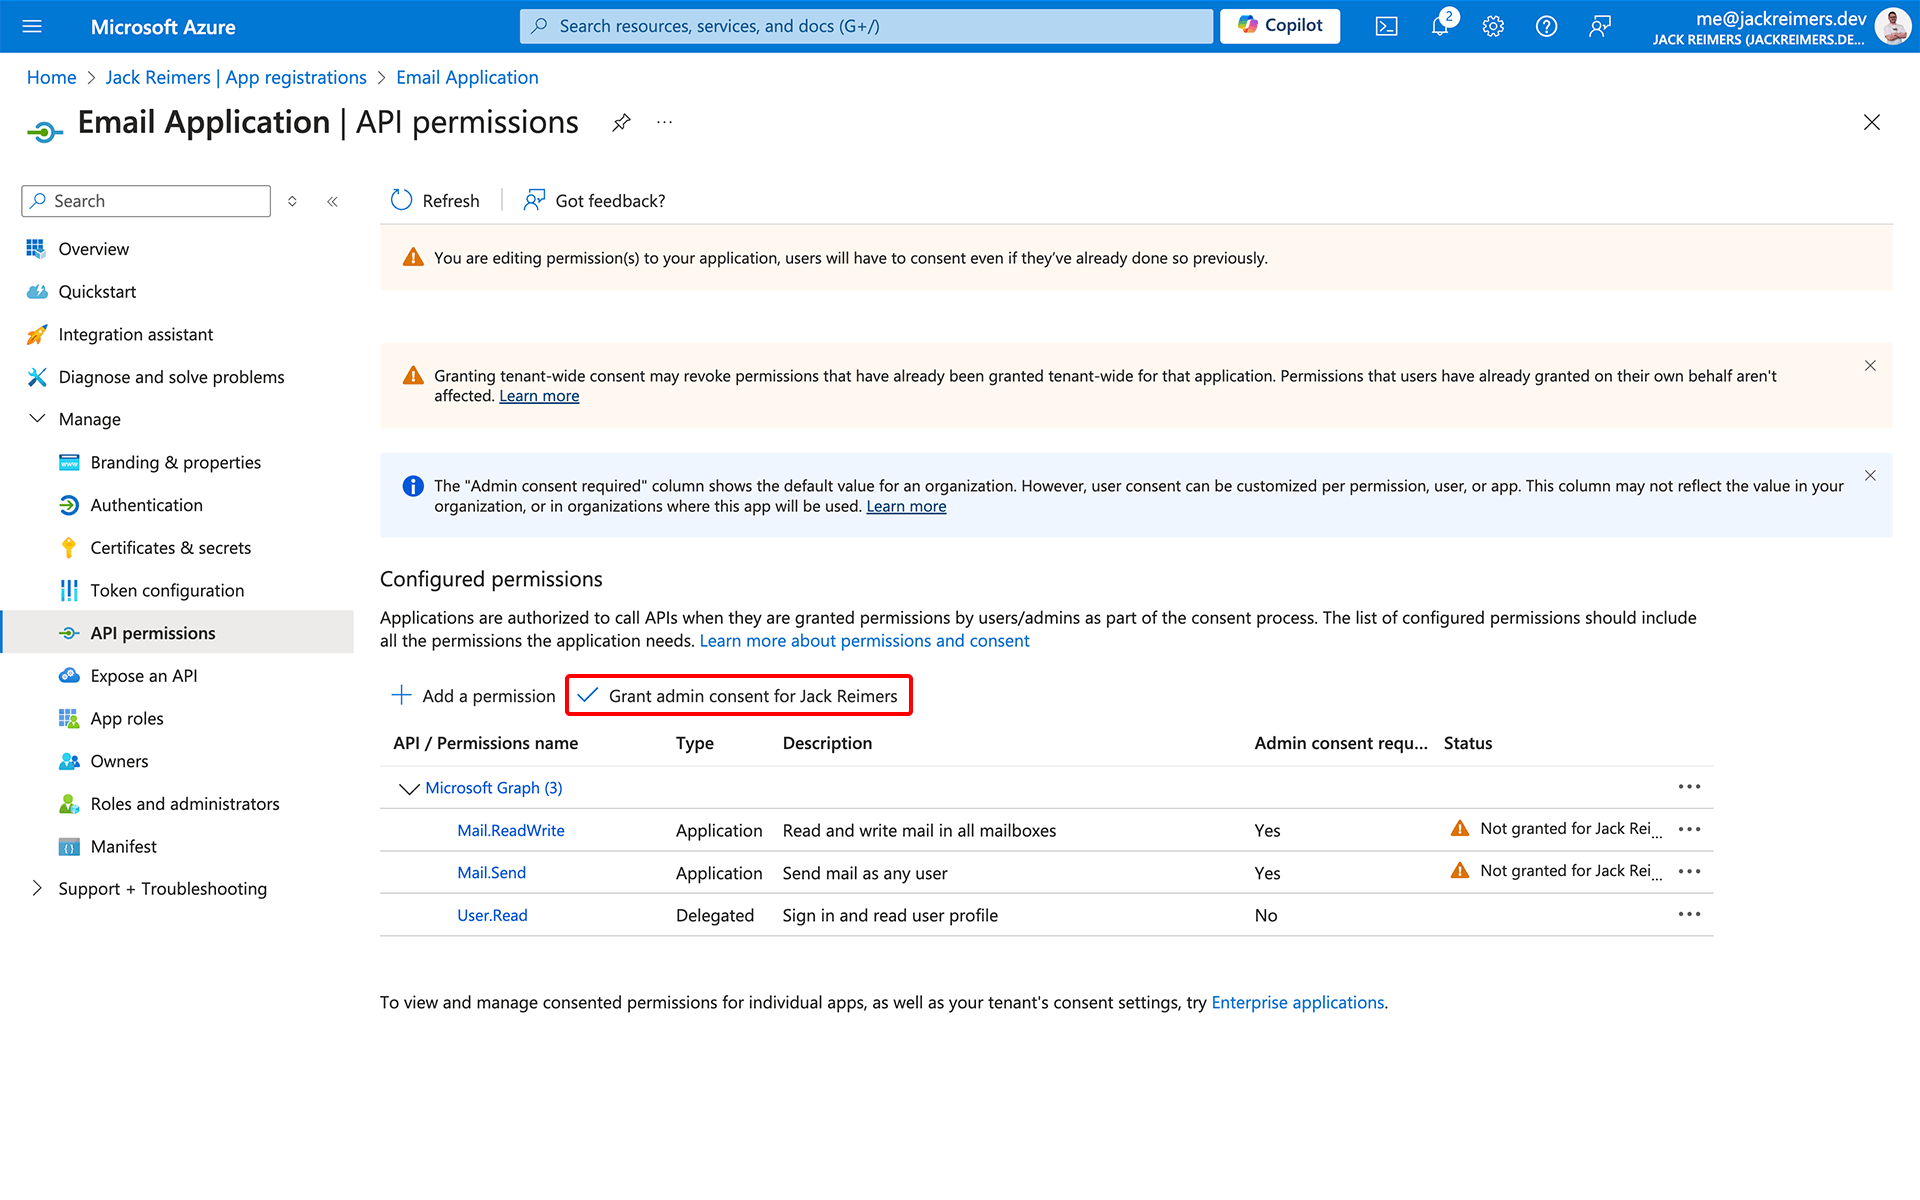
Click Grant admin consent to activate the permissions.
3. Generate a Client Secret
The final step in setting up your Enterprise Application is to generate a client secret, which can be thought of as a password. This password will be used by your application to authenticate with Azure.
Multiple client secrets can be generated for an Enterprise Application, which can be used to rotate credentials or revoke access.
Navigate to Certificates & secrets and click New client secret.
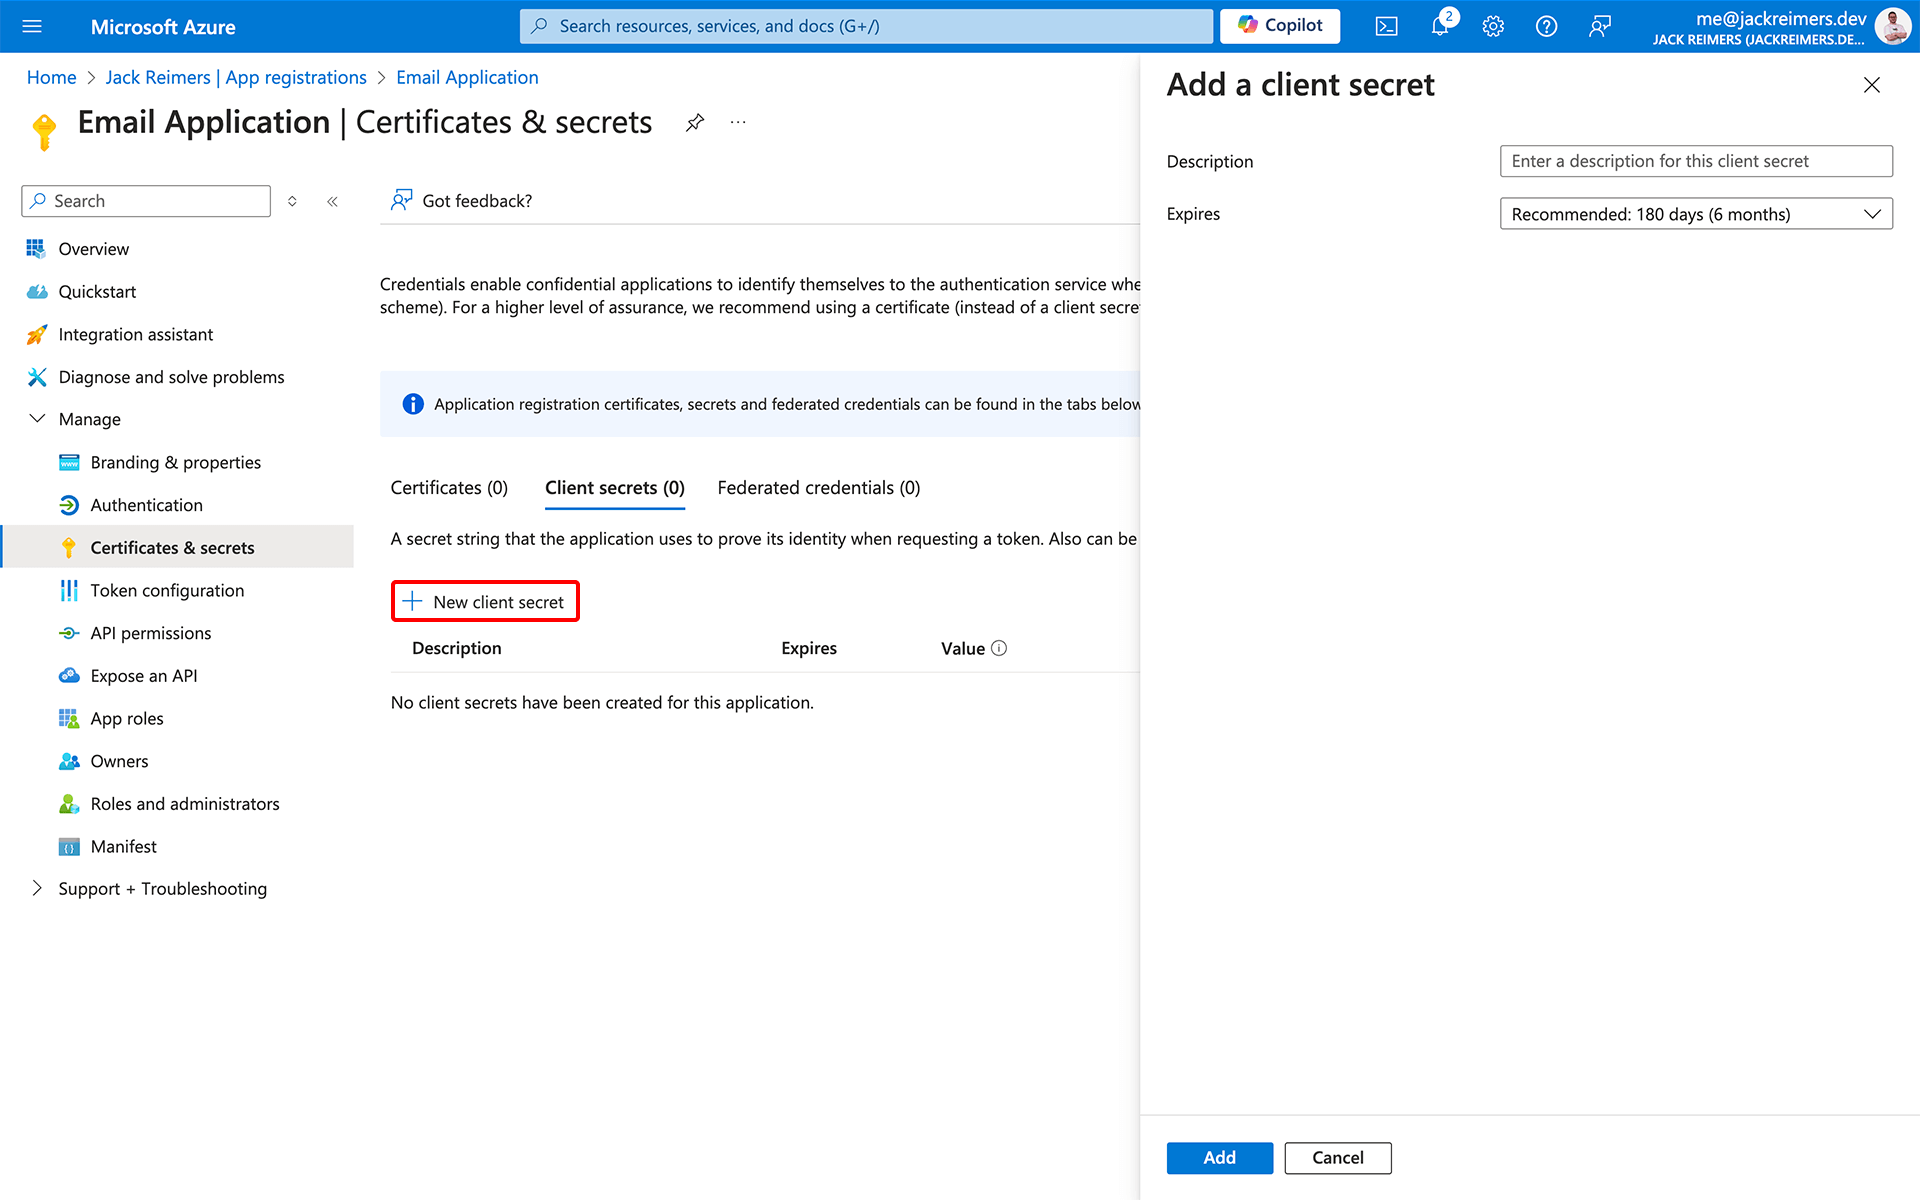
Give your client secret a description, set the expiry date, and click Add.
Important
The client secret will only be displayed once and cannot be retrieved again.
Application Setup
Once the Azure setup is complete you can use the credentials generated to authenticate your application and send emails. Microsoft maintains SDKs in multiple languages that make authenticating and calling the API easy.
In this example I will be using the TypeScript SDK. To see the full list of SDKs available visit the Microsoft Graph SDKs page.
1. Gather Secrets
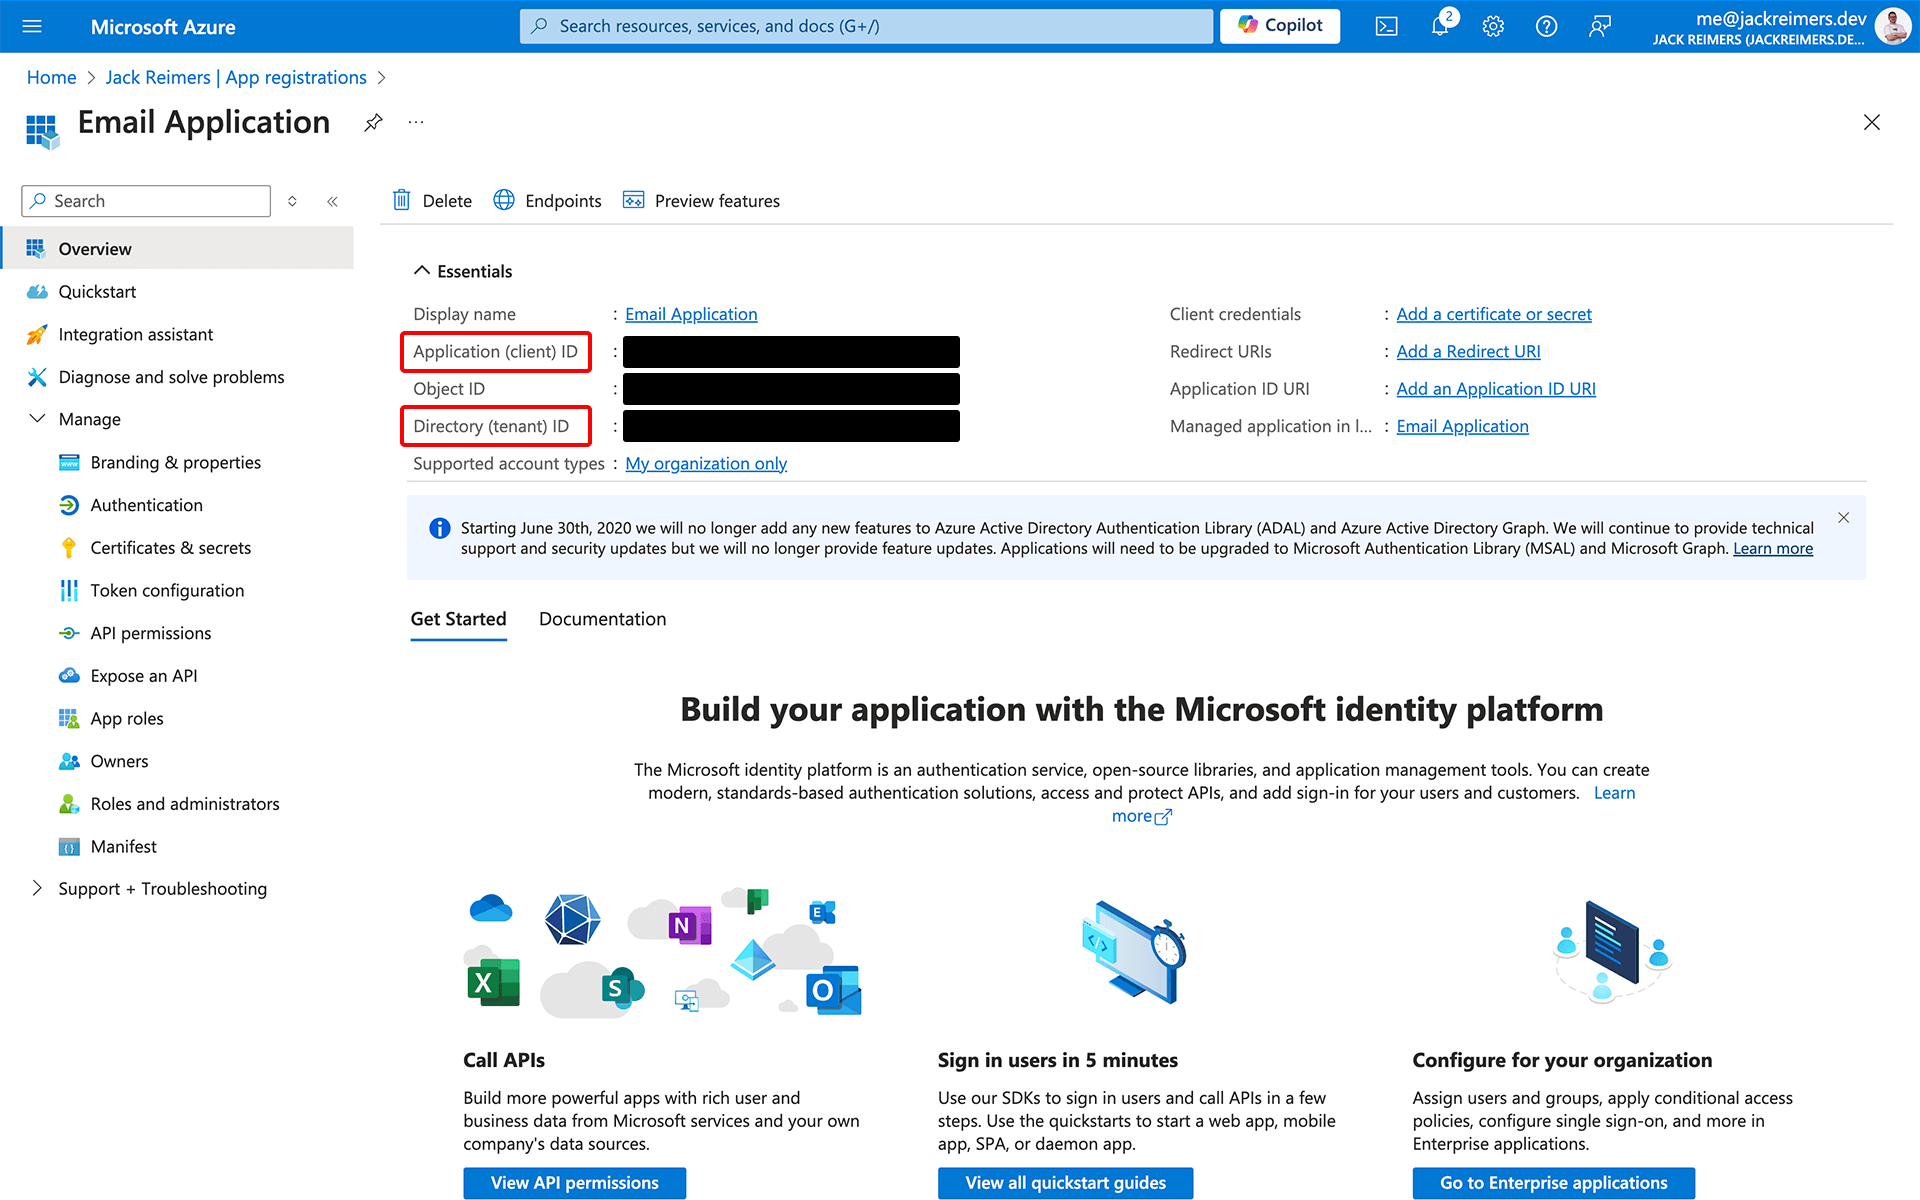
For your application to authenticate it will need three secrets:
- Tenant ID
- Client ID
- Client Secret
You should already have your client secret from the previous step. To find the remaining secrets navigate to Entra ID > App registrations > All applications and open the Enterprise Application you just created.
2. Install Packages
If you haven't already, create a new project and install the packages below using your package manager of choice.
1 | |
2 | |
3. Create the Graph Client
When creating a graph client you will need to provide the three secrets required to authenticate with Azure. Ensure that you store and handle these secrets securely and never use them on the frontend.
I recommend using a utility function to create the graph client like I do below. This will make it easier to reuse the code if you need to create it in more than one place.
Important
All code in this guide must be run on a server or backend service as it requires access to the client secrets.
1 | |
2 | |
3 | |
4 | |
5 | |
6 | |
7 | |
8 | |
9 | |
10 | |
11 | |
12 | |
13 | |
14 | |
15 | |
16 | |
17 | |
18 | |
4. Send an Email
Once you have the graph client, you will need to construct a payload that represents the email you want to send. Microsoft maintains the Graph Explorer which is invaluable for testing and debugging your requests and provides examples for payloads.
1 | |
2 | |
3 | |
4 | |
5 | |
6 | |
7 | |
8 | |
9 | |
10 | |
11 | |
12 | |
13 | |
14 | |
15 | |
16 | |
17 | |
18 | |
19 | |
20 | |
21 | |
22 | |
23 | |
24 | |
25 | |
26 | |
27 | |
Considerations
Due to application permissions being used, the credentials generated for this application are able to read the emails of any user in your tenant and send emails as them without their knowledge. Consider the security implications of this and in cases where you only need to send emails on behalf of a specific user, or you want to require user consent, it may be better to use delegated permissions.
This implementation of emailing is also basic and does not include many of the marketing and analytics features that are provided by other solutions. If you require these features you may be better off using a third-party email service.
Conclusion
In this guide I have shown you a cost-effective way to send emails programmatically by setting up an Enterprise Application in Azure and using the Microsoft Graph API, avoiding the need to use a high cost third-party email service.
Sending emails is only the tip of the iceberg when it comes to what you can do with the Microsoft Graph API. I encourage you to explore what it can do and how it can be used in your application!